Shooting
Shooting Process
Mastering the Art of Iris Photography: Techniques and Workflow
Background knowledge of image creation
We have developed the following four key techniques that make up our unique image quality:
1. Precise positioning of the iris
The iris is a ring-shaped muscle, roughly the shape of a disc, with a hole in the centre (the pupil). Interestingly, when a person looks straight ahead, the iris is not parallel to the object being viewed, but slightly tilted horizontally and vertically. To compensate for this, we use a dividing mirror positioned in front of the camera and adjusted to match the tilt of the iris. This aligns the iris in the reflection parallel to the image sensor, making it easier to focus.
2. Precise illumination
The cornea of the eye is a vitreous body and therefore reflects everything in its environment. Our IRIS PHOTO.ART flashes have a sophisticated lighting concept that allows only the iris to be illuminated. This special lighting avoids reflections from the surroundings.
However, make sure that direct sunlight or a similarly bright light source is not shining into the eye, as this will be visible as a reflection above a certain brightness.
3. Two shots with two flashes
The reflection of the flash itself in the iris is unavoidable. Therefore, we take two shots in quick succession with differently positioned light sources. Using this technique and masking, we can create an image without reflections.
4. Fokus-Stacking
We also take two pairs of images that differ slightly in the plane of focus. These are later combined using focus stacking to create a consistently sharp image.
Shooting Workflow
Successful iris shoots require a lot of practice and the ability to adapt to different facial shapes and structures. Each person is unique and it is necessary to shoot a number of different people to develop a full understanding of the requirements and challenges.
In this training we will give you important tips on how to position the client, but remember that practice and experience are the keys to success. The more you practice and master different situations, the better your skills and results as a photographer will become.
An Overview over the single Steps

Communication
Iris photography is a process based on successful teamwork. To get a high quality image, the cooperation between you as the photographer and the client is crucial.
It is important to communicate this to the client from the beginning to foster mutual understanding and cooperation.To create an atmosphere of trust, you should briefly explain the different steps of the iris photography process to the client. This way, the client can better understand why their cooperation is so important.
Iris photography is a team effort.
Preparing the camera and computer
Make sure the camera is switched on. The switch is located under the camera, next to the power cable. The USB cable must also be connected to the computer. Again, make sure you are using a USB Super Speed port. For more information on setting up your equipment, look in the corresponding course.
Iris Photo Control
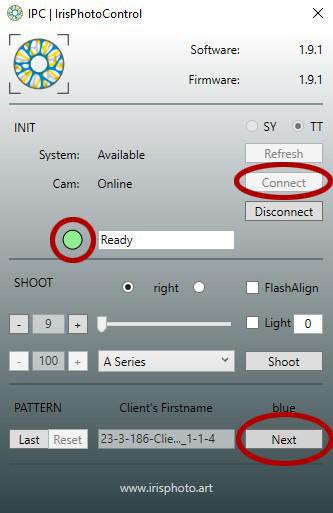
Open the IrisPhotoControl software and wait until the system is set to "Available". Then click on the Connect button.
The camera will connect and a test image will be created and downloaded. After this, both the control lamp on the camera and the circular indicator in the software will light up green. The camera is now ready.
However, before you can take a picture, you need to create a new image instance using the 'Next' button. The camera will not respond until you have done so.
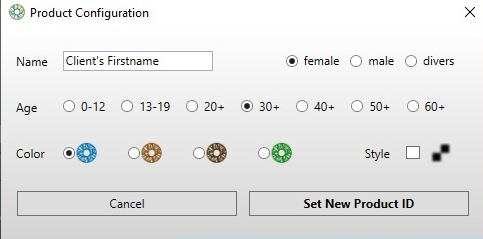
New Image Instance
In the Product Configuration dialogue box, enter the required customer information.
The name will be part of the file name and will allow us to correctly identify the images after a multi-person shoot.
You can estimate age and gender, we use this information for our statistics.
Eye colour is used as a parameter for image processing.
Once you have filled in all the fields, you can confirm with "Set New Product ID".
Multishot mode is automatically selected (four shots with focus shift).
2 or 4 pix?
As explained before, our photography technique involves taking 4 shots to create one flawless image.
The four pictures with focus adjustment enhances sharpness, which, for small prints made on-site, might be considered excessive. Working with just 2 shots simplifies and speeds up the retouching process because it eliminates the need to merge two layers of sharpness.
Our camera therefore offers two different shooting modes. One SingleShot and one MulitShot mode. You have to choose this in the software.
If you believe a single layer of sharpness is adequate for your needs, using just two images to produce the final picture is a viable option. However, for the highest quality outcome, employing all four images is recommended.
Positioning the client
Positioning the client is essential. The client should be seated or standing in a relaxed and stable position. The head should be positioned in a way that the iris is optimally exposed.
Remember that clients need to remove their glasses and contact lenses. Keep the necessary equipment clean and ready.
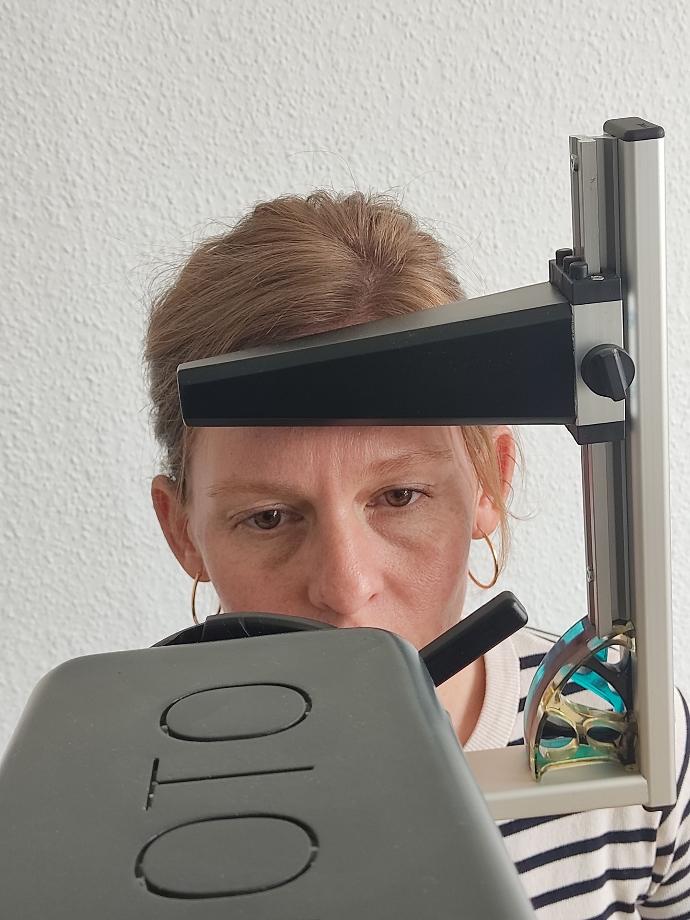
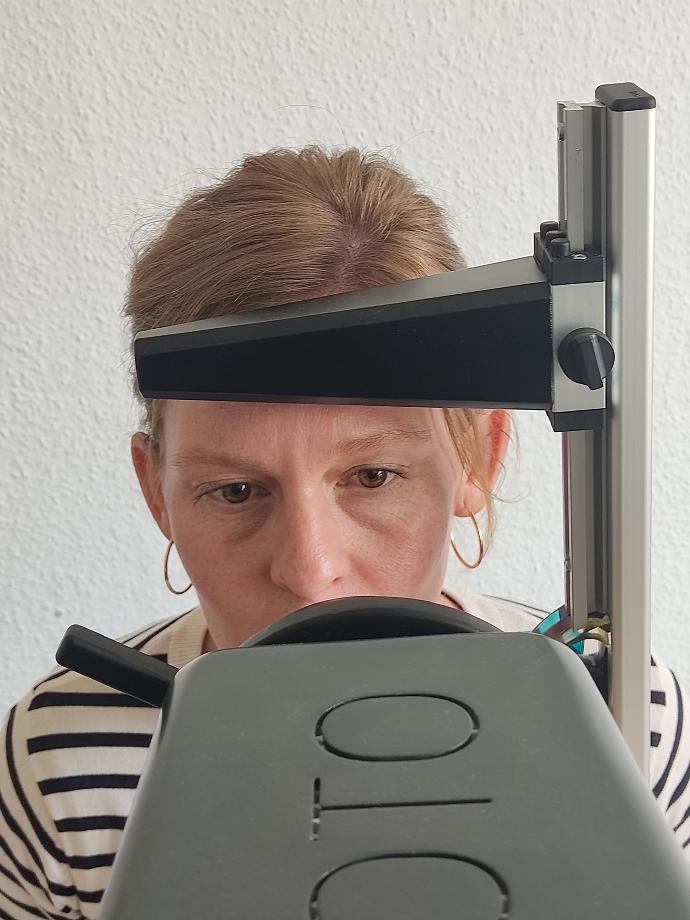
Sitting position
Ensure that the chair is close to the table and that the client can sit comfortably with a straight back. The client's chin should rest on the chin rest and the forehead should touch the forehead rest. These two fixed points ensure a stable position of the head, including the iris, which is essential for sharp photographs.
First adjust the height of the table so that the client's chin rests on the chin rest. Then adjust the forehead section to the height of the face.
The client's arms should be relaxed and crossed in front of the headrest. This position is ideal as the client will need to pull their own lower eyelid down to expose the iris as the photograph progresses.
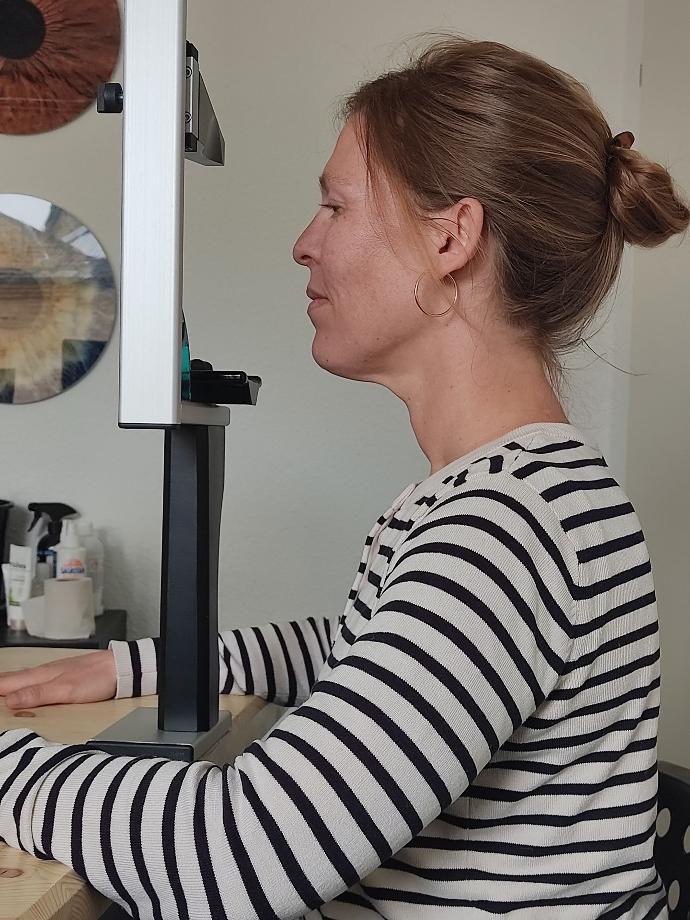
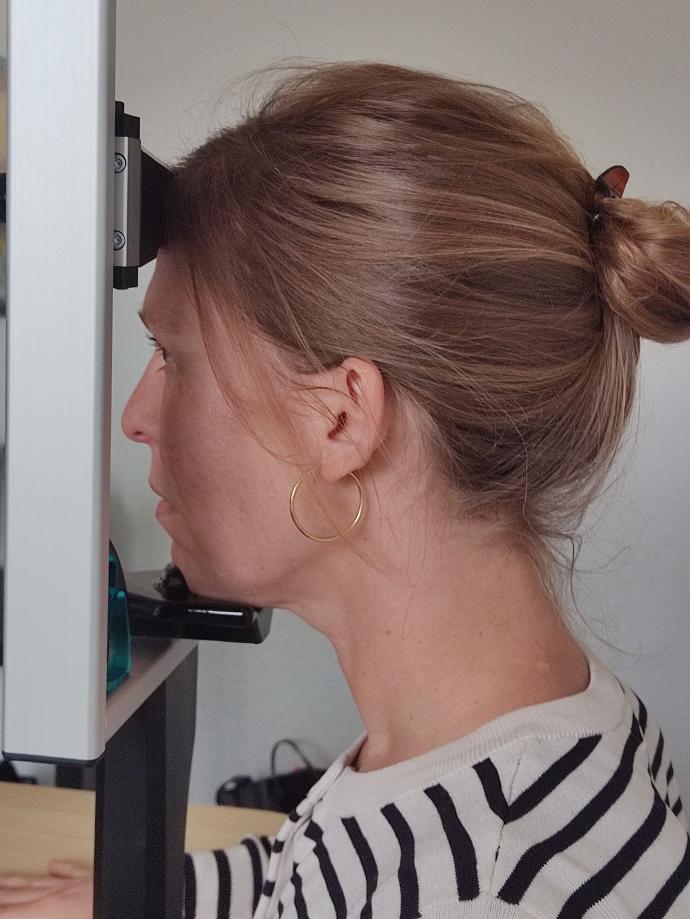
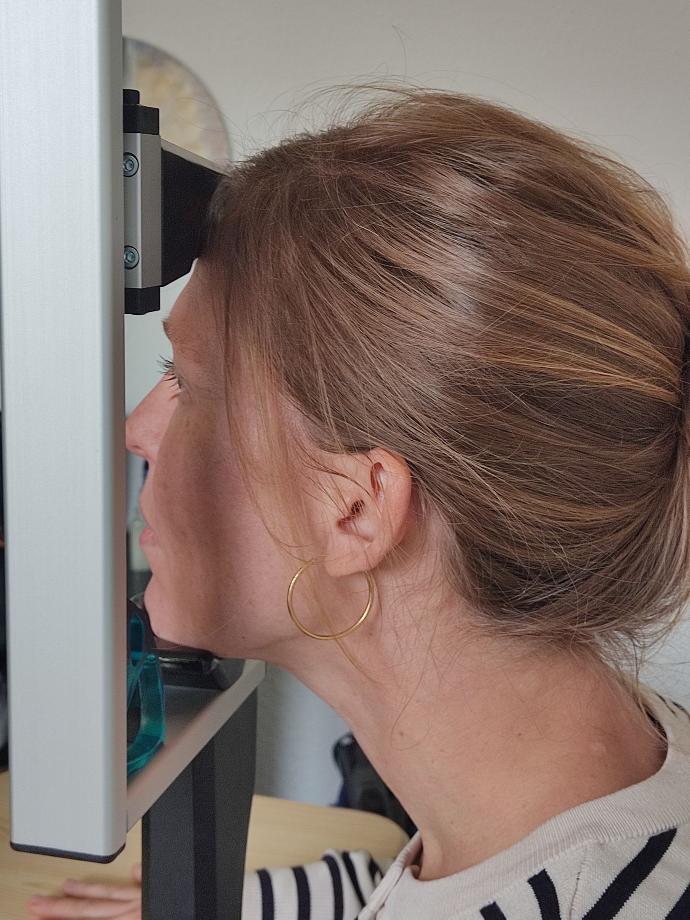
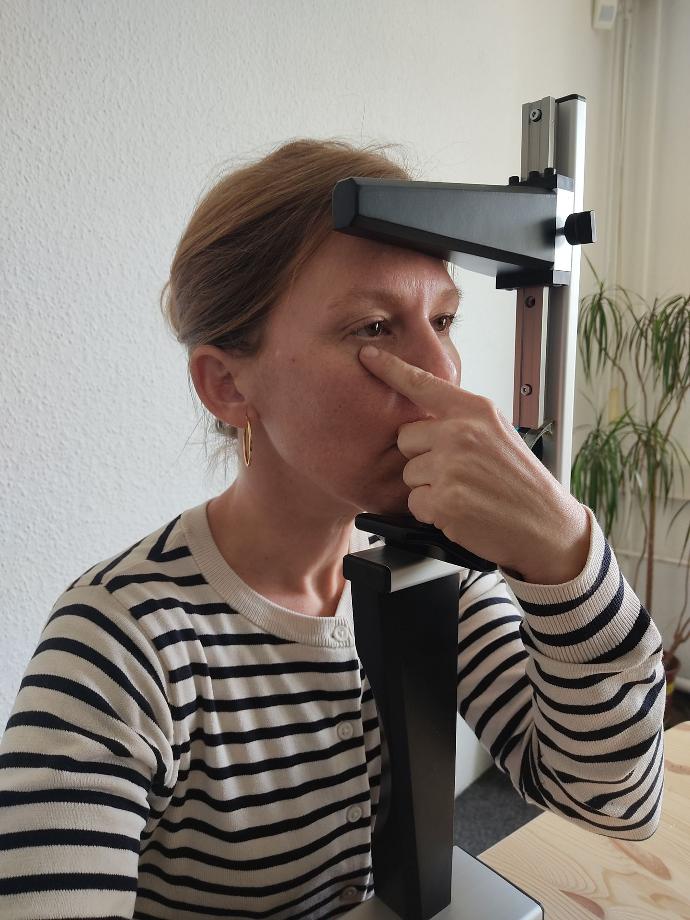
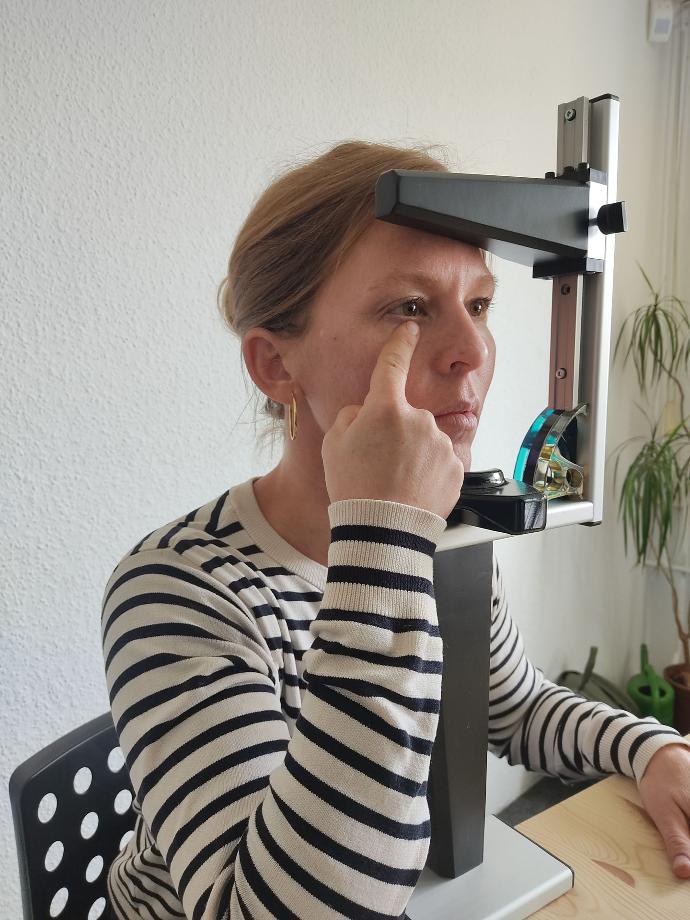
Customer from side
The client sits sideways on the chair with the back straight. Everything is adjusted to the correct height.

Client from above
The client's arms rest relaxed on the table.
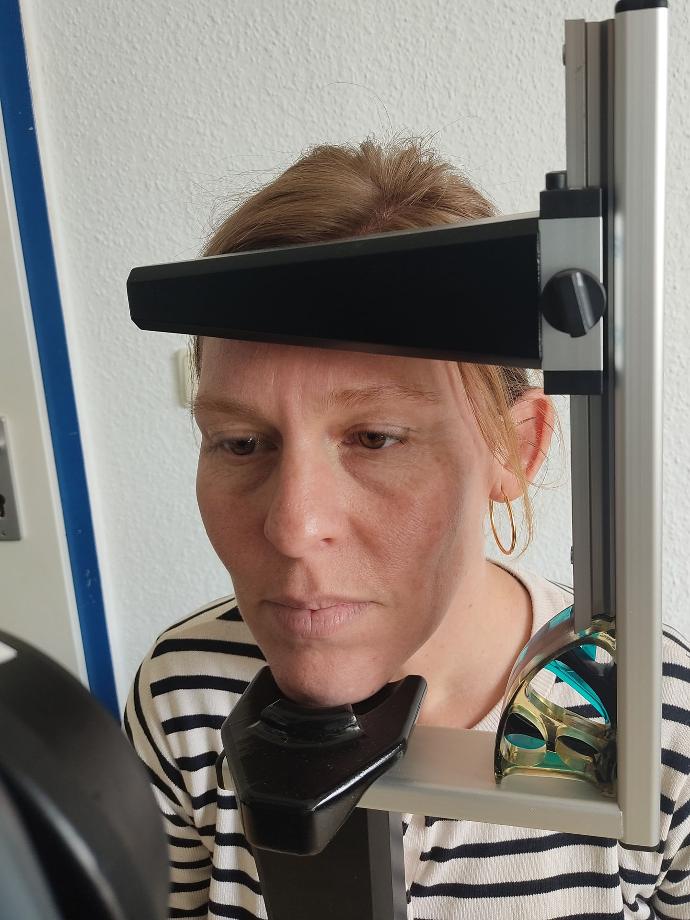
Head position
Start by positioning the client's head so that it is facing the camera without turning sideways.
The chin cup can be moved horizontally to adjust the vertical angle of the head. For people with deep-set eyes or a pronounced eye bulge, move the chin cup further forward to improve the angle of the head. This adjustment helps to expose the eye better as you do not have to lift the upper eyelid very much, if at all. The lower eyelid is usually much easier to pull down. Experiment with different head positions and angles to find the best possible alignment for each individual physiognomy.
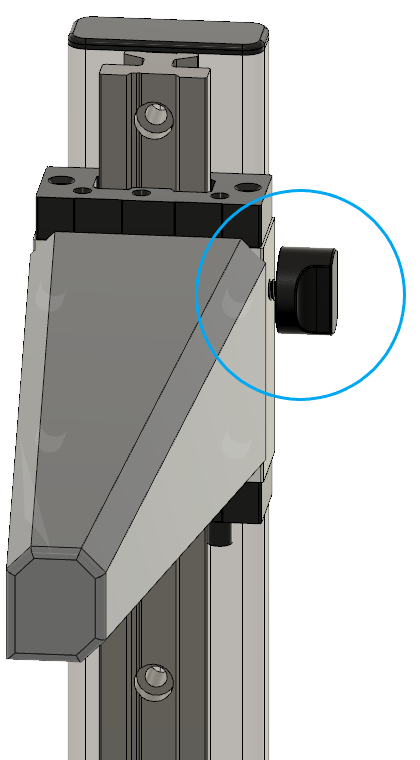
Adjustment Knob
Loosen the screw to move the slider up or down.

Move front rest
Move the slider to match the length of the client's face.
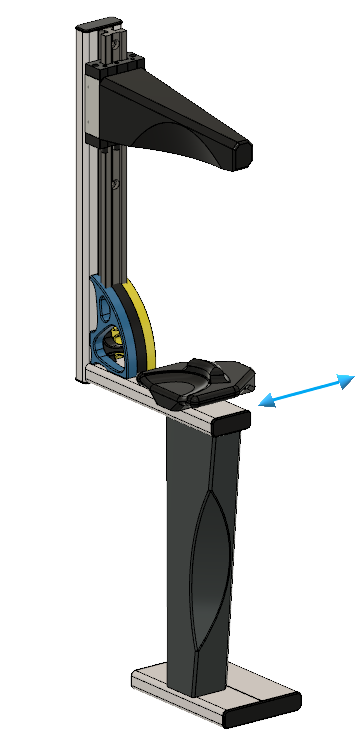
Chin Slider
Chin rest slides horizontally to control the tilt of the client's head.
Head position Chin back
The iris has a lot of room at the bottom and relatively little at the top.
Head position Chin front
The head is tilted backwards.
Head position Chin front
The iris is more centred and there is equal space above and below.
The shooting process
The modelling light
Slowly turn up the light using the slider on the camera. The light is needed both to see and focus on the iris and to regulate the pupil size. The aim is to keep the pupils as small as possible to see more of the iris. People react very differently to changes in light. Some people constrict quickly, while others need a lot of light to close the pupil a little. This behaviour may change slightly as the session progresses.
Set the light only as bright as necessary, as it can be quite dazzling, especially in dark surroundings.
The rotating mirror
Decide which eye to photograph and rotate the mirror so that the handle is pointing towards the client's nose. Instruct the client to always look at the reflection of their own iris
Right Eye
The mirror is turned to the right of the photographer and the client looks into the reflection of his eye and looks slightly upwards to the left.
Left Eye
The mirror is turned to the left of the photographer and the client looks into the reflection of his eye and looks slightly upwards to the right.
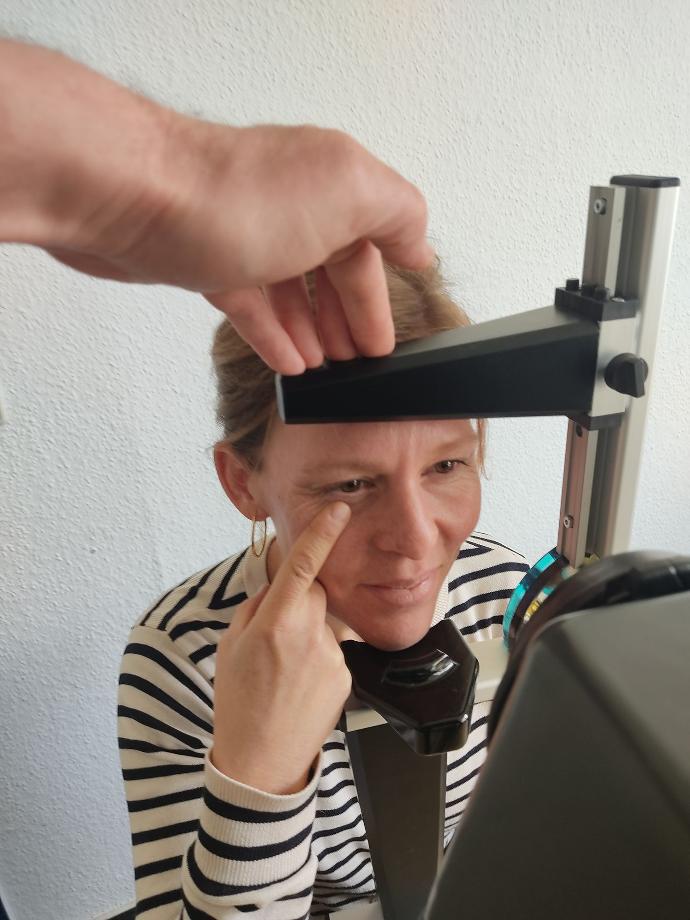
Fingers in position
Have the client place their index finger under the iris with the other fingers closed. Children can use their index and middle fingers to pull the lower eyelid down, it is important that the finger is directly in the centre and under the eyelid to achieve the best opening angle. However, the client should not pull yet, as the eye is prone to tearing if exposed to the surrounding air for too long. Tears should be avoided as they will appear as a haze in the image.
To prevent the hand from casting a shadow on the iris, it is best if the client uses the arm opposite the eye to be photographed. If this is not possible because the arms are too short, the client should ensure that the hand is held flat.
Crossed arm
This position ensures that the client's hand is not in front of the flash. However, if the arms are relatively short, this position can be tiring. Children have arms that are too short.
Arm straight
This position is more comfortable for the client. However, it is important that the fingers are closed and the hand is flat.
Aiming
Using the crank stand and crossbar, move the aperture to the centre of the camera so that it is exactly in the centre of the Live View screen and as sharp as possible.
Initialise shooting
Press the foot pedal to initialise the camera for shooting. (As soon as you release the foot switch, the image sequence is recorded).
Communication
It is important to brief the client once again before the shoot so that he or she can play along perfectly in the following seconds.
Say again in a compact way: "From now on, don't move your head, always look at the reflection in your eye. You can blink as long as we are not taking pictures. I'm going to pull your upper eyelid up first, and you're going to pull your lower eyelid down with me".
ATTENTION with children = repeat this procedure verbally and physically.
Eye opening techniqes
The process of opening the eyes may require the most practice and requires both a gentle and firm approach. The longer the process takes, the more difficult it may be for the client to remain calm. Don't hesitate to make physical contact.
The upper eyelid can be opened with the thumb of the left hand. Your index finger should be positioned either on or against the front rest of the headrest for stability. This will ensure a firm grip.
There are two main methods of opening the upper eyelid. One method is to touch the lid or under the lashes. Although this tends to be more uncomfortable for the client, it is particularly advantageous with longer lashes as you can reach underneath and push them aside.
However, many clients find direct eye contact uncomfortable, which can lead to involuntary blinking. A useful tactic might be to ask the client to close their eyes first and then place your thumb on their upper eyelid. Then verbally instruct them to open their eyes while you gently pull their eyelid open a little further. This prevents the client from seeing your thumb approaching their eye, although the disadvantage is that you cannot reach under the lashes from this position.
Lift the client's upper eyelid and ask them to lower their lower eyelid, exposing about 3mm of the eyeball.
Stability
The hand of the photographer is stable.
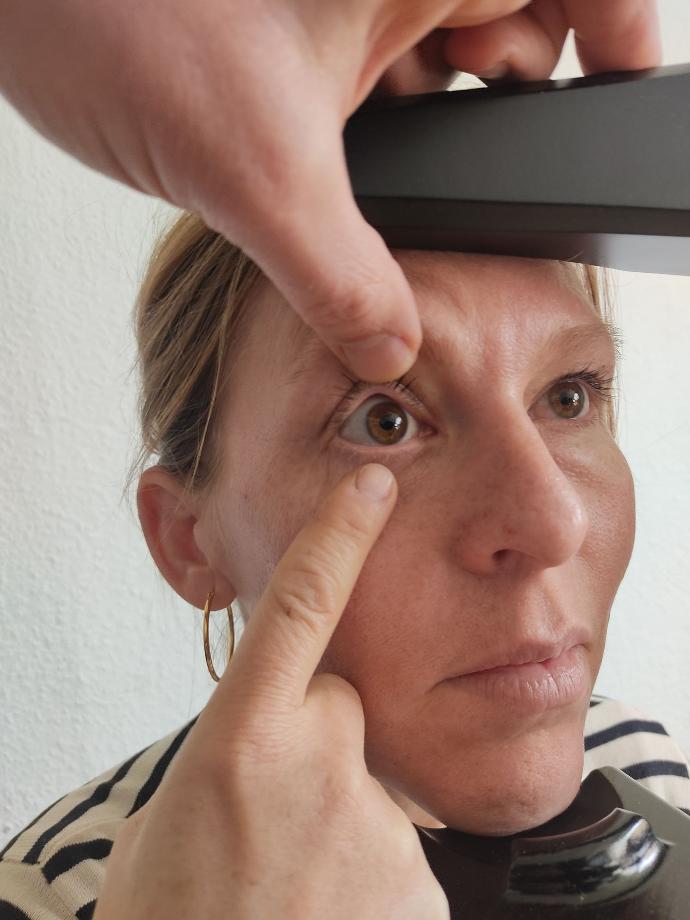
Lifting up upper lid
The use of the under-the-lash grasping technique here.
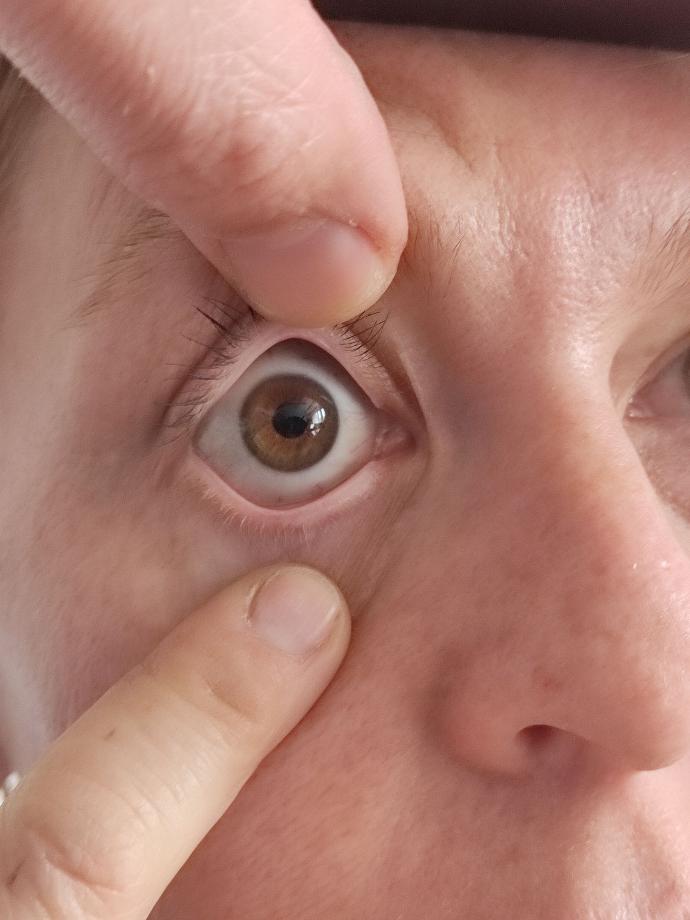
Cient pulls lower lid
The iris is now perfectly exposed for photography.
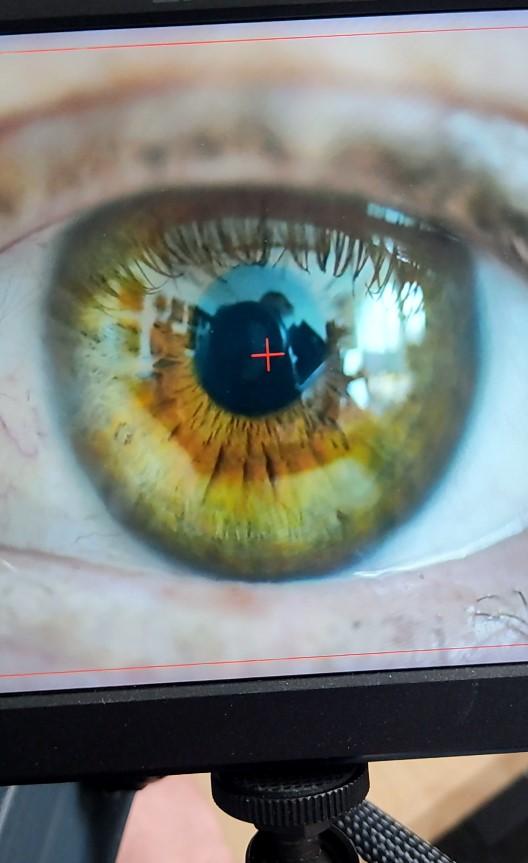
Focusing
Focusing is one of the most critical moments in iris photography. Focus is adjusted by moving the entire camera back and forth on the crossbar. Feel free to move the camera back and forth several times while watching the image on the monitor. This will allow you to see how the depth of field shifts. As we are photographing a more or less tilted disc, as explained above, the line of focus on the monitor will run as a diagonal line from the bottom right to the top left, or vice versa.
The aim is to focus on the point in the back third of the focus plane. The best way to do this is to move the camera from front to back and then back a little. Set the focus at 2 o'clock (for the left eye) or 10 o'clock (for the right eye) between the pupil and the outer edge of the iris.

Right Eye
Focus point around 10 o´clock.
Left Eye
Focus point around 2 o´clock.
Shoot
When the focus is correct, release the pedal and the appropriate series of shots will be taken. Usually one shot is not enough to get a good result. It is best to immediately take another picture. Let the client blink in between, but not move his head.
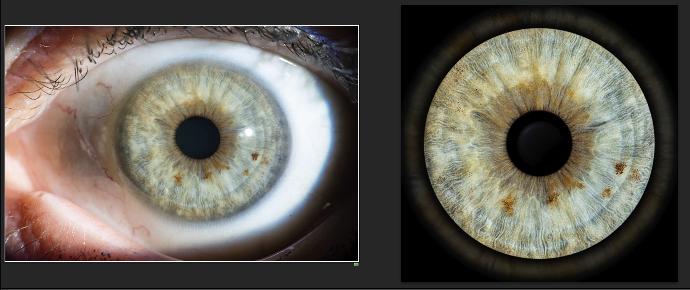
Reference photos
A series of reference photos for common mistakes and positive examples
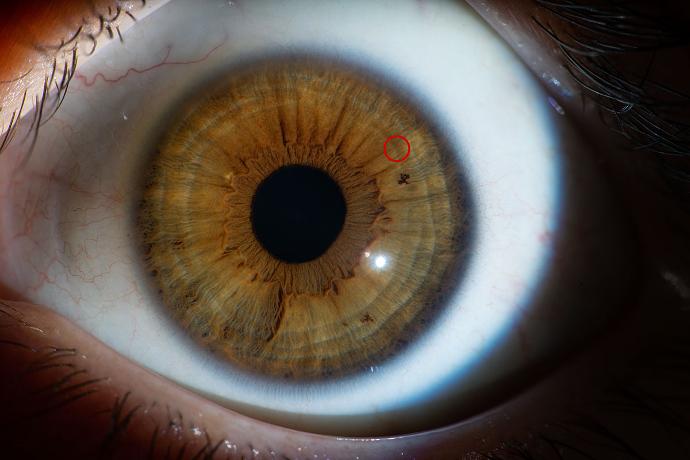
Bad Image
Light coming from the top left (Flash I)
Issue:The eyelashes shadowing the iris.
Solution: Move your thumb more to the left.
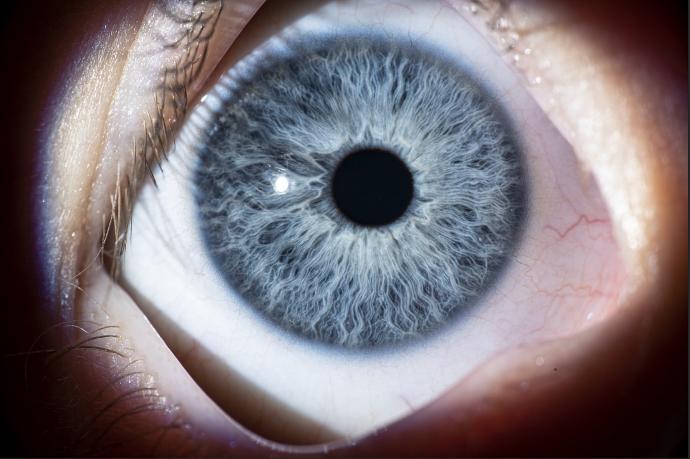
Bad Image
Light is coming from the bottom left (Flash I)
Issues: The eyelashes are shadowing the iris. The lower flash is not well aligned.
Solution: Re-align the lower flash further down. Move your thumb more to the right.
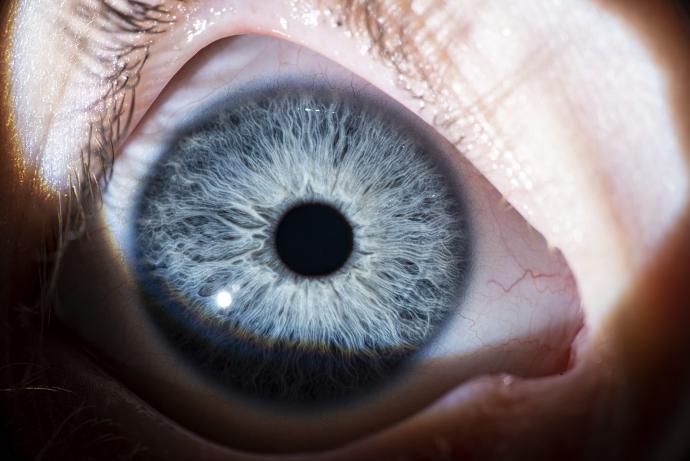
Bad Image
Light coming from the top right (Flash II)
Issues: The eyelashes shadowing the iris.
Solution: Position your thumb more to the right, rotate the head of the client a little to his right, so that the iris is more in the centre of the eye.
Bad Image
Light coming from the bottom right (Flash IV)
Issue: Lower lid shadowing the iris.
Solution: The client needs to place his finger closer and in the center under his lower eyelid and pull his eyelid down more.
Bad Image
Light is coming from the top right (Flash II)
Issues: The eyelashes are shadowing the iris. Iris is too close to lower lid.
Solution: Move the client's chin slightly backwards or have them pull their eyelid down more. Grab the lashes more completely.
Bad Image
Light coming from the top right (Flash II)
Issues:
Flash not well aligned. Iris not in the center of the camera.
Solution: Position the iris in the center. Move the flash up a little.
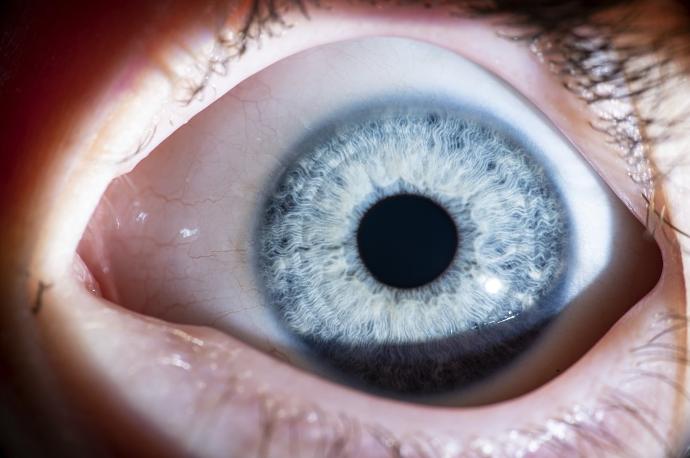
Good Image
Light coming from top left (Flash I)
The shot is good, but the adjustment light is too weak, so the client's pupils are too large. The less total light there is (the darker it is before the shot), the larger the pupils are to let in the light.
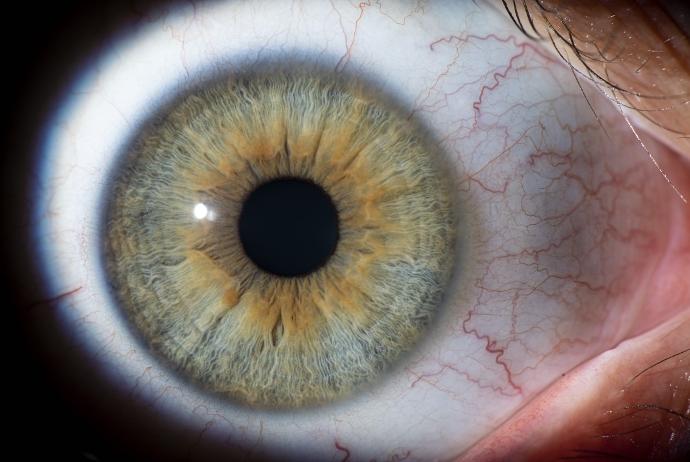
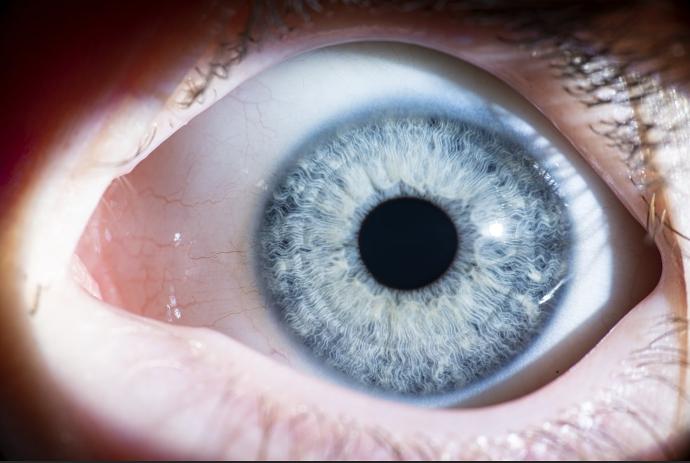
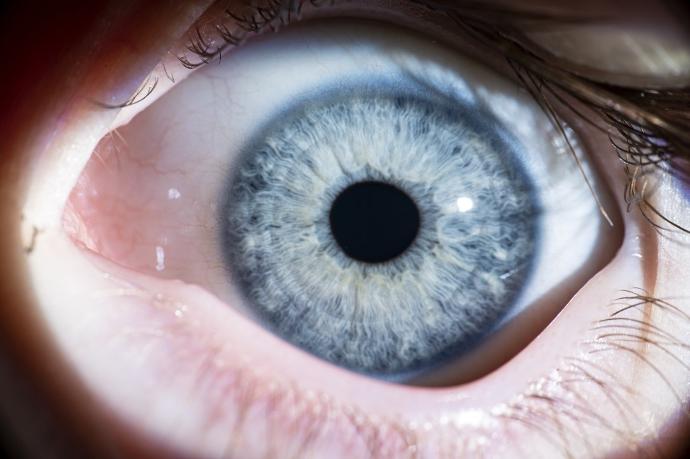
Very good Image
Light coming from top left (Flash I)
The shot is perfect.
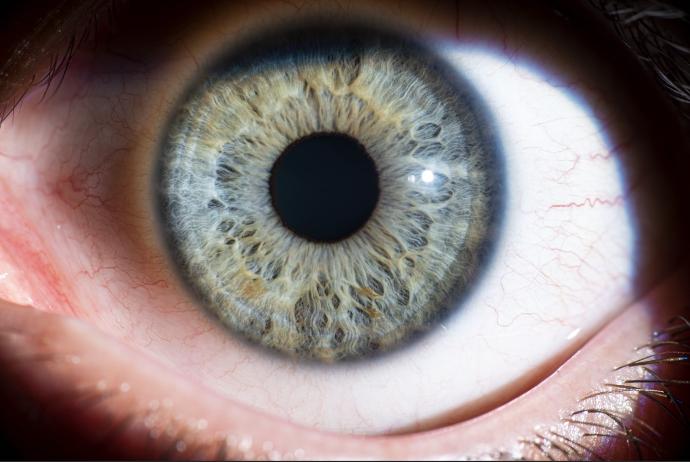
Very good Image
Light is coming from the top right (Flash II) The shot is perfect.
| Views | |
|---|---|
| 11 | Total Views |
| 11 | Members Views |
| 0 | Public Views |
| Actions | |
|---|---|
| 0 | Likes |
| 0 | Dislikes |
| 0 | Comments |